How to Enable MFA on Microsoft 365 for Better Security
Cybersecurity threats are on the rise, and protecting your Microsoft 365 environment has never been more critical. A simple yet powerful way to boost your defenses is to enable MFA on Microsoft 365. Multi-factor authentication (MFA) provides an extra layer of security by requiring users to verify their identity with something more than just a password. Why is this so important?
Consider this scenario: an employee’s password is compromised through a phishing attack. Without MFA, that’s a direct door into your company’s sensitive data. With MFA enabled, the attacker would also need access to a second factor, like a mobile authentication code or biometric confirmation, greatly reducing the risks.
Another instance where MFA proves invaluable is with remote work. Employees logging in from various devices and locations pose a greater security risk, but MFA ensures those accessing company resources are who they say they are. To dive deeper into how multi-factor authentication works and the security advantages it offers, check out Microsoft’s guide on MFA basics and setup, or explore their recommendations for protecting your accounts. Getting started with MFA might just be the smartest move you make for your organization’s security today.
By enabling MFA, you can reduce the chances of a hack by up to 99.9%! In this post, I’ll walk you through how to set it up for your Microsoft 365 account.
Why Enable MFA on Microsoft 365 is Important?
Think about your email account. If someone hacks into it, they could cause a lot of damage. They could send phishing emails to your contacts, steal money by altering payment details, or even sit quietly in your inbox waiting for the perfect moment to strike.
Multi-Factor Authentication adds an extra layer of protection. With MFA, even if someone has your password, they still can’t access your account without an additional verification step.
Understanding Security Defaults in Microsoft 365
By default, Microsoft 365 tenants have Security Defaults enabled. This feature automatically enforces baseline security measures, including:
- Mandatory MFA for all users.
- Blocking legacy authentication protocols.
Security Defaults aim to protect organizations from common attacks without requiring advanced configurations. However, they may not suit organizations needing tailored security settings.
In these cases, admins can disable Security Defaults and implement other MFA options, such as per-user MFA or Conditional Access policies (the latter is more advanced and will be covered separately).
Check out more similar articles below:
Exchange Online Cloud Email: Complete Beginners Guide
Microsoft Teams Tutorial: A Complete Guide for Beginners
Microsoft 365 Setup: Practical Guide For IT Pros
Intune Training Made Simple: Start Learning Now
How to Enable MFA on Microsoft 365
Here’s a simple step-by-step guide demonstrating how to enable MFA on Microsoft 365 for your account.
Step 1: Log Into Microsoft 365 Admin Center
To enable MFA, you’ll need access to the Microsoft 365 Admin Center. The following roles are required to complete this process:
- Global Administrator
- Security Administrator
- User Administrator
These roles allow you to access the necessary settings for managing user accounts and enabling MFA.
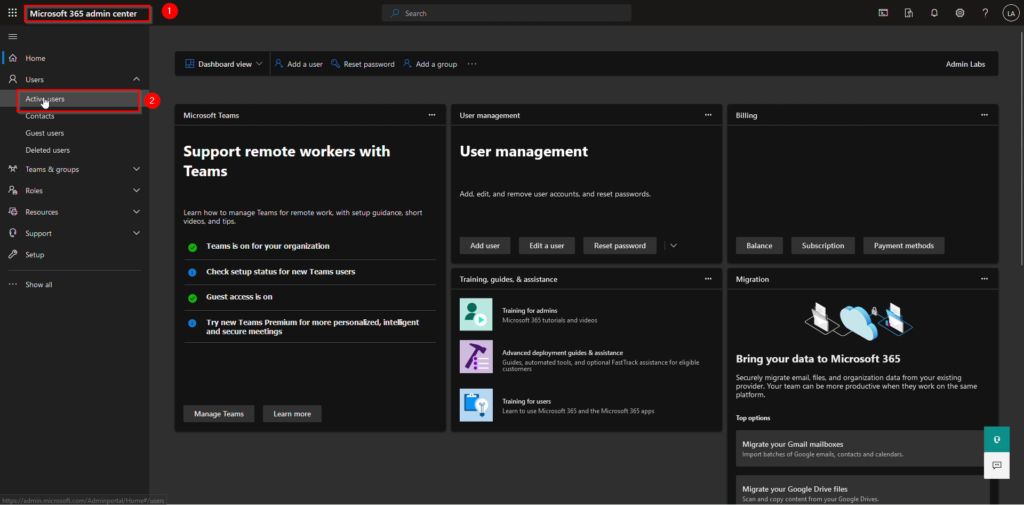
- Go to your Microsoft 365 Admin Center (you may need admin access for this step).
- Once logged in, navigate to Users > Active Users.
Step 2: Enable MFA for Your Account
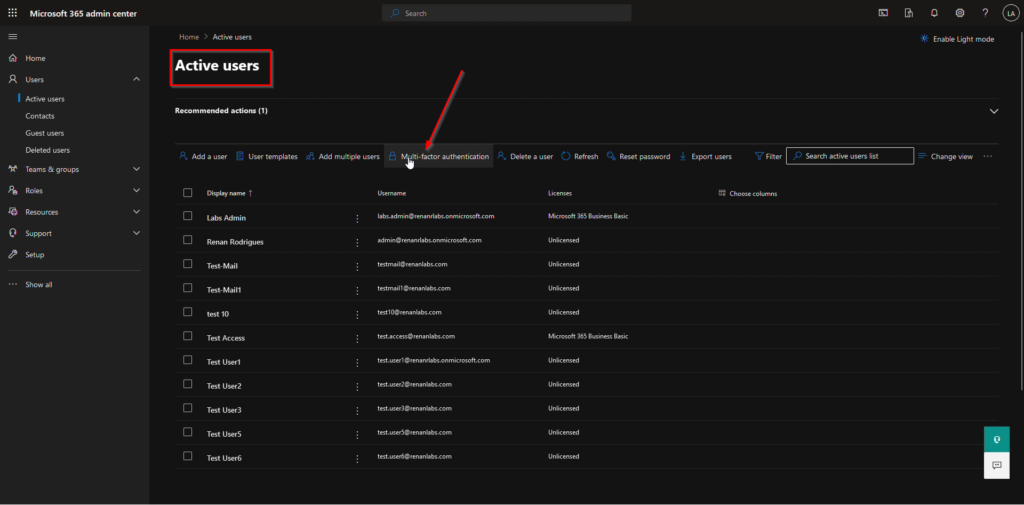
- In the Admin Center, click on Multi-factor authentication at the top.
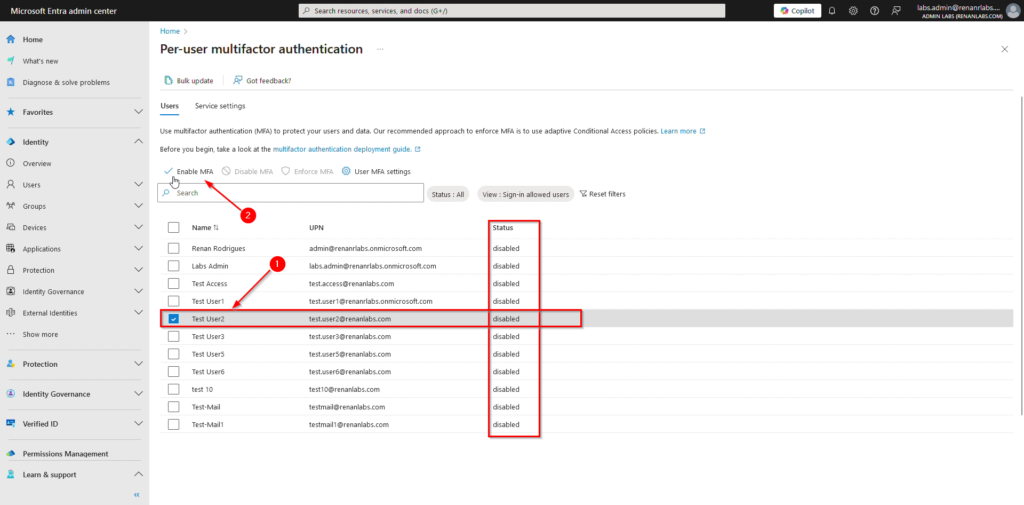
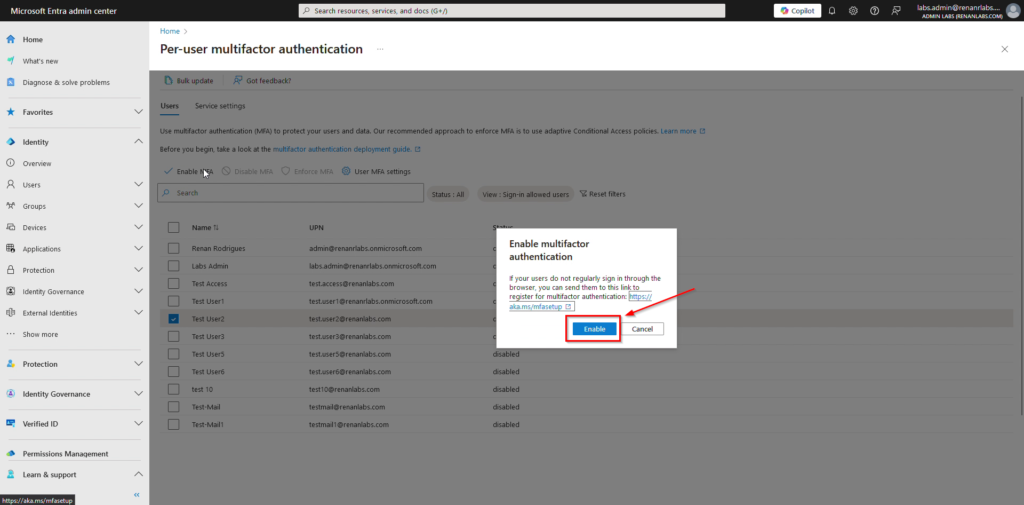
- Find your user in the list and click Enable next to your name.
Step 3: Enable MFA on Microsoft 365
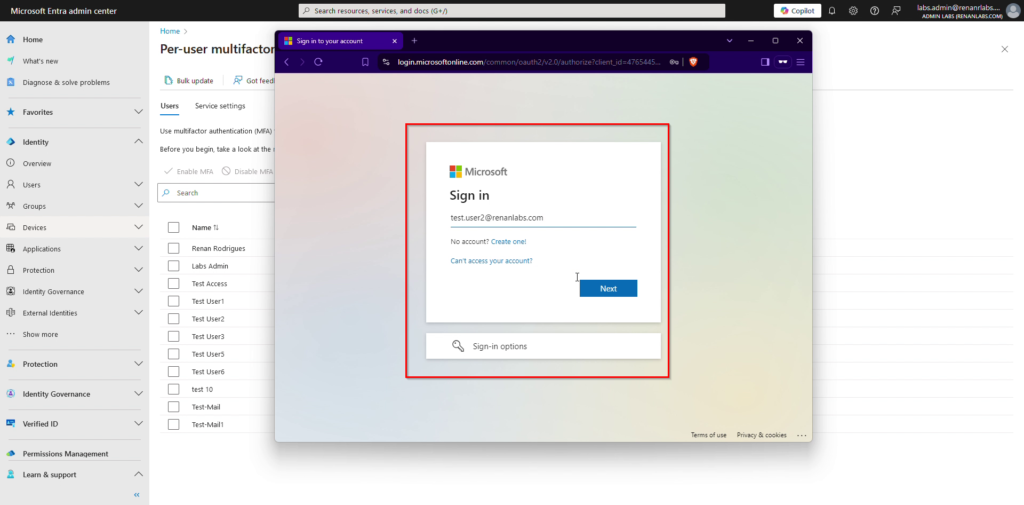
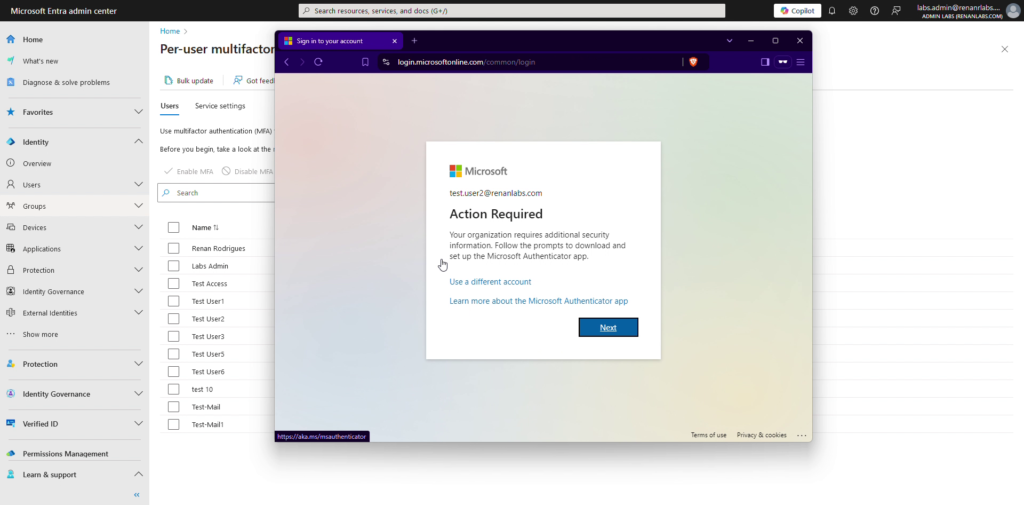
- Go to the Microsoft 365 login page and log in with your username and password.
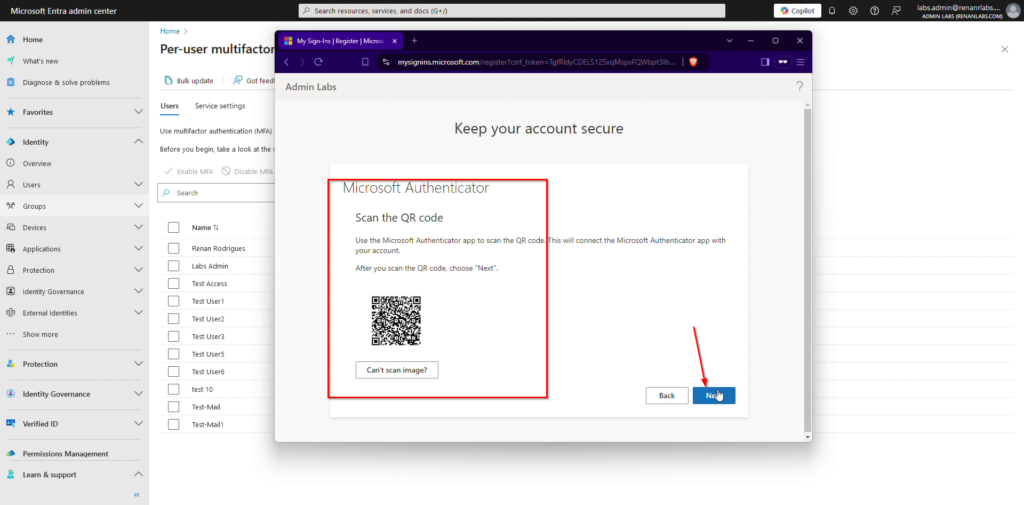
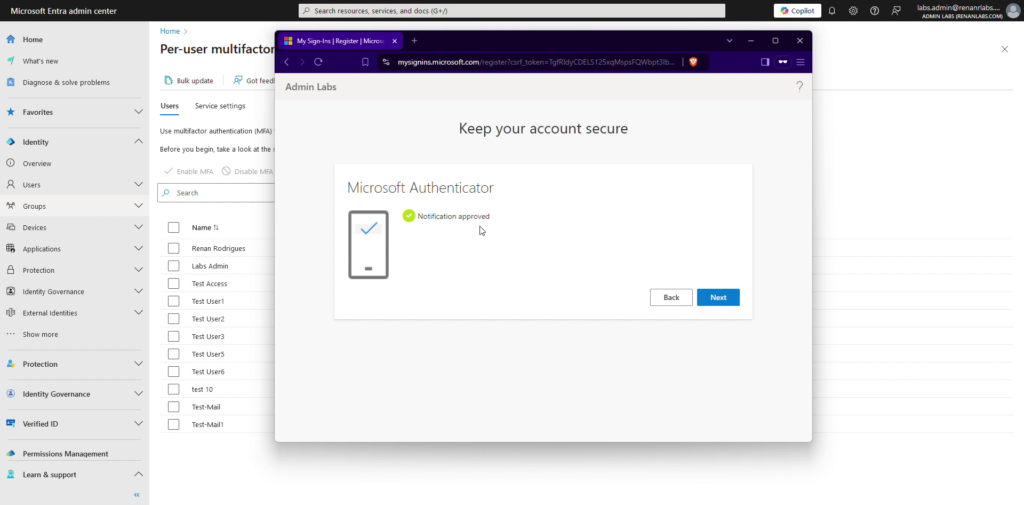
- You’ll be prompted to set up MFA. Select Mobile App and click Setup.

Final Steps: Download the Microsoft Authenticator App
To complete the setup, make sure you have the Microsoft Authenticator app installed on your phone:
- Open the App Store (iOS) or Google Play Store (Android).
- Search for Microsoft Authenticator and install it.
Conclusion
That’s it! You’ve successfully set up Multi-Factor Authentication on your Microsoft 365 account. With this extra layer of protection, your account is far safer from hackers.
Don’t wait – secure your account today by enabling MFA!
Check out more similar articles below:
How to Migrate Files to SharePoint Online: 2025 Ultimate Guide
How to Migrate Files to SharePoint Online: 2025 Ultimate Guide Migrating your file shares to…
How to Configure App Protection Policies in Microsoft Intune
How to Configure App Protection Policies in Microsoft Intune In today’s business landscape, safeguarding sensitive…
Azure Cloud Migration for Beginners: A Practical 2025 Guide
Azure Cloud Migration for Beginners: A Practical 2025 Guide Moving your business to the cloud…
Ultimate Guide to How to Screenshot on a Computer Mac
Ultimate Guide to How to Screenshot on a Computer Mac For nearly two decades, I’ve…
SharePoint Site Building: A Complete Walkthrough for Your First Collection
SharePoint Site Building: A Complete Walkthrough for Your First Collection It is not very easy…
Intune Training Made Simple: Start Learning Now
Intune Training Made Simple: Start Learning Now Microsoft Intune is a powerful cloud-based service that…


