
How to delegate Active Directory groups
If you are looking for the possibility to grant rights to a non-administrator user to manage a security Active Directory group membership, but don’t want give him access to Active Directory Users and Computers snap-in, learn below How to delegate Active Directory groups.
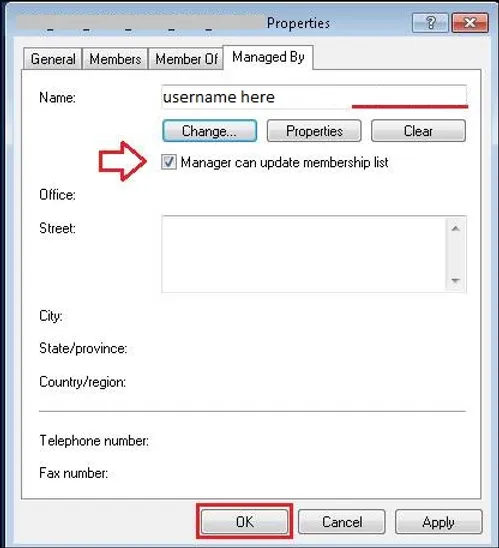
Delegating Membership Management with the Managed By Tab
1 – The easiest way to delegate membership management of a single group is to use the Managed By tab of a group object’s Properties dialog box, as shown below:
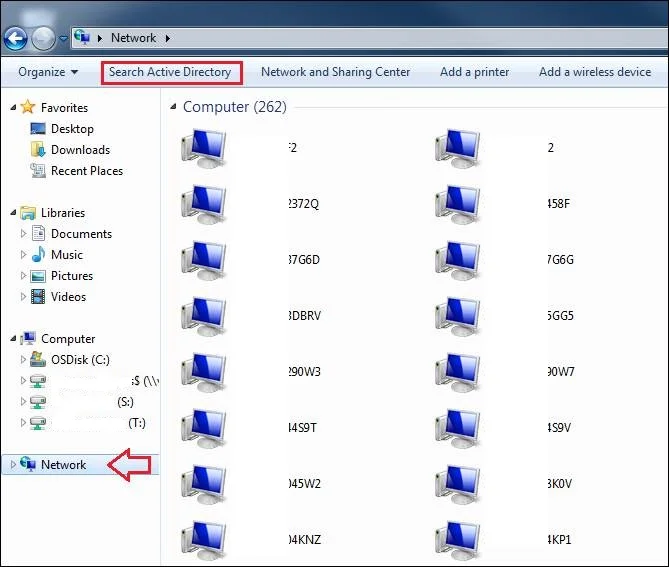
2 – Now, the end user is able to manage the group. To do it, he needs to open the Network window, and then, click on the button Search Active Directory, as shown below:
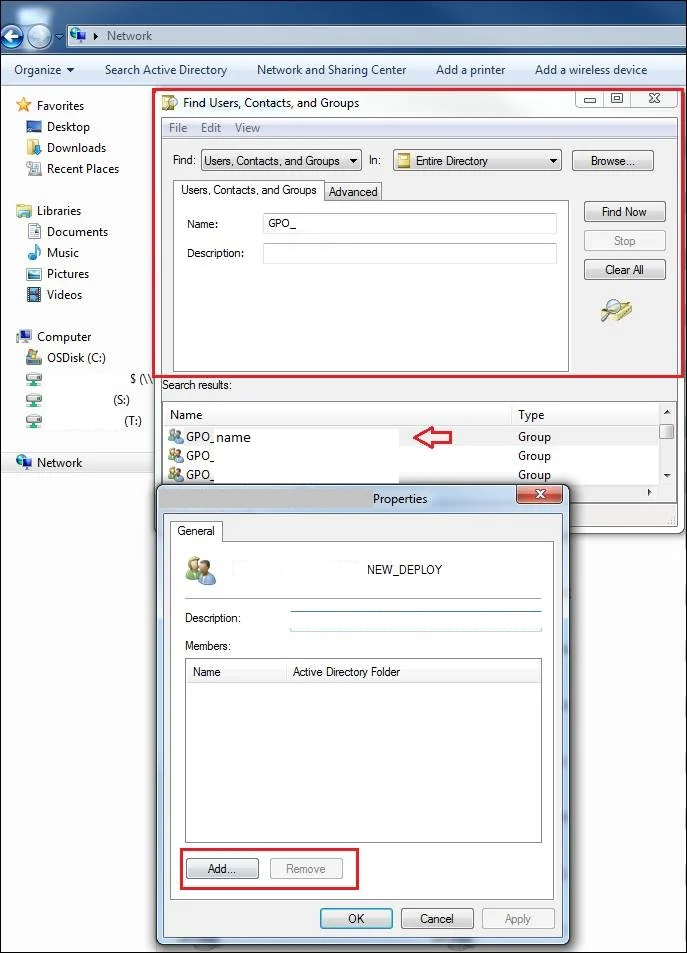
3 – Next, the window Find Users, Contacts, and Groups will appear. The user will need to type the group’s name and click on “Find Now” button. After the group is found and selected, the user will be able to manage the group’s membership, as shown in the picture below:
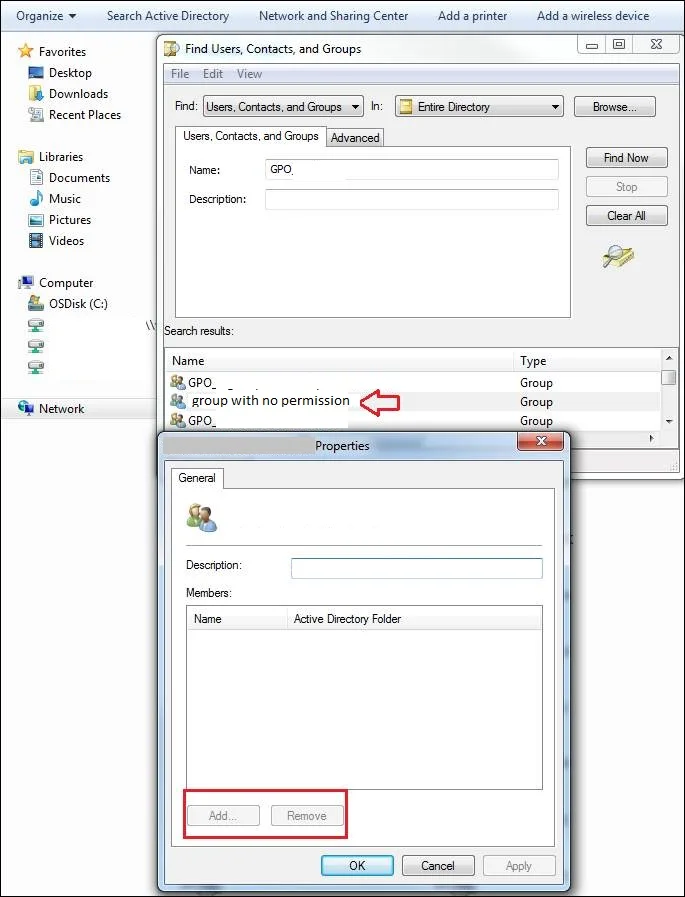
4 – If the user tries to access and edit a group that he doesn’t have permission to, the Add and Remove buttons will remain inactive for alteration, as shown below:
Technical Guide: Delegating Active Directory Groups to Users
Delegating control of Active Directory groups to users allows for more efficient management of group memberships without granting full administrative rights. Here’s a step-by-step guide on how to delegate Active Directory groups to users:
- Open Active Directory Users and Computers: Log in to a domain controller or a computer with the Active Directory administrative tools installed. Open “Active Directory Users and Computers” from the Start menu or Server Manager.
- Locate the Organizational Unit (OU): In the console tree, navigate to the OU that contains the groups you want to delegate control over.
- Access Delegation of Control Wizard: Right-click on the OU, select “Delegate Control” to open the Delegation of Control Wizard.
- Select Users or Groups: Click “Next”, then “Add” to select the users or groups to whom you want to delegate control. Click “OK” and then “Next”.
- Choose Delegated Tasks: Select “Create a custom task to delegate” and click “Next”.
- Specify Object Types: Choose “Only the following objects in the folder” and select “Group objects”. Click “Next”.
- Select Permissions: Choose the specific permissions you want to delegate. For group management, typically select:
- Create, delete, and manage groups
- Modify the membership of a group
- Review and Complete: Review your selections on the summary page. If everything looks correct, click “Finish” to apply the delegation.
After completing these steps, the selected users or groups will have the ability to manage the specified groups within the OU, without having full administrative control over the entire Active Directory.
Note: Always follow the principle of least privilege when delegating control. Only grant the minimum necessary permissions required for users to perform their tasks.
Regularly review and audit delegated permissions to ensure they remain appropriate and secure.
Still need help on how to delegate Active Directory groups?
Running out of ideas or time How to delegate Active Directory groups? Please contact me here, I will be happy to provide you with a quick analysis for resolution and configuration, at a fair price. Or use the form below if you prefer:
Check out more similar articles below

How to Migrate Files to SharePoint Online: 2025 Ultimate Guide
How to Migrate Files to SharePoint Online: 2025 Ultimate Guide Migrating your file shares to…

How to Configure App Protection Policies in Microsoft Intune
How to Configure App Protection Policies in Microsoft Intune In today’s business landscape, safeguarding sensitive…

Azure Cloud Migration for Beginners: A Practical 2025 Guide
Azure Cloud Migration for Beginners: A Practical 2025 Guide Moving your business to the cloud…

Ultimate Guide to How to Screenshot on a Computer Mac
Ultimate Guide to How to Screenshot on a Computer Mac For nearly two decades, I’ve…

SharePoint Site Building: A Complete Walkthrough for Your First Collection
SharePoint Site Building: A Complete Walkthrough for Your First Collection It is not very easy…

How to Enable MFA on Microsoft 365 for Better Security
How to Enable MFA on Microsoft 365 for Better Security Cybersecurity threats are on the…